[philiptellis] I love food, and I like writing about food. Follow me as I follow my nose, seeking out gastronomic delicacies wherever I find myself


Monday, July 31, 2017

Mango Salsa

In India, Mangoes are considered the king of fruit. We had a couple of mango trees in our backyard when I was growing up, but I liked climbing the trees far more than I liked eating the mangoes, mainly because I'm someone who likes my fruit crunchy.

Many years later, at a little bistro in Paris that S & I ended up at quite by accident, we tasted a most excellent Mango Salsa as a side for Duck Confit. We tried to reproduce that salsa and this is what we came up with...

Ingredients

  • 1 ripe mango (it needs to be sweet, in the US this is sometimes considered overripe)
  • 1 small shallot (optional, skip if you don't like the taste of raw shallots)
  • ¼ cup cilantro leaves
  • 1 tsp cilantro seeds
  • 1 tsp chilli flakes
  • 1 tbsp lemon juice

Procedure

  1. Roast the cilantro seeds in a pan on medium-low heat until you can smell the aroma
  2. Transfer the cilantro seeds to a mortar to cool
  3. Dice the mango into a salad mixing bowl (instructions available here)
  4. Add chilli flakes to the mango
  5. Dice the shallot (instructions here) and add to the mango
  6. Chop up the cilantro leaves and add to the mango
  7. Now crush the roasted cilantro seeds with the mortar & pestle. You can use the back of a spoon on your cutting board as well, but that's harder. Do NOT turn it to a powder.
  8. Add the crushed cilantro seeds to the mango
  9. Add lemon juice
  10. Toss & serve

This salsa goes well with spicy tacos or a fatty dish like duck confit. Even great on its own. They have a little spice of their own, but are mostly sweet, and the freshness of the cilantro and mango provides a great accent for the rest of your meal.

Veggie Spice Rub (Tacos or a Side Dish)

This is a spice rub I use for veggies that act as the main ingredient in tacos. In particular, chickpeas, cauliflower, beets and other firm veggies that will stand up to a bake. You could probably use it for chicken as well.

Ingredients

  • 1 tsp cumin seeds
  • ¼ tsp coriander seeds (optional)
  • 2 tsp chilli powder
  • ¼ tsp garlic powder
  • ¼ tsp onion powder
  • ¼ tsp paprika or chilli flakes
  • 1 tsp salt
  • 1 tbsp lime or lemon juice (depends on your taste)
  • 1 tbsp olive oil (do NOT use extra virgin olive oil as it has a low smoke point)
  • 1 tbsp water

Procedure

  1. Roast the cumin and coriander seeds on a pan on low-medium heat until you can smell the oils
  2. Transfer to a spice or coffee grinder and grind them to a powder. (You can also use an old fashioned mortar and pestle, but that's more work)
  3. Mix all the dry ingredients together
  4. Add the lime/lemon juice and olive oil and mix to form a paste
  5. Add water to adjust consistency and mix

I use this with canned chickpeas, canned black beans, cauliflower florets, sliced beets, brussels sprouts. Mix them into the spice bowl to coat evenly. Let stand for about 15 minutes, and then roast in the oven at 400℉. Adjust the amount of spice used uniformly based on the quantity of veggies you use.

The veggies are great on tacos with the standard add ons (lettuce, cilantro, sour cream & salsa), and also as a side dish for a larger meal.

Friday, September 25, 2015

Lemon Rice

S & I really like lemon rice with daal. She generally does the daal, and I make the lemon rice. I've gone through a few iterations before ending up with this version.

Ingredients

  • 1½ cup rice
  • 3 cups water
  • 1 tsp salt (to taste)
  • ¼ tsp turmeric powder
  • 2 tbsp vegetable oil (I use grapeseed)
  • ½ tsp mustard seeds
  • 1 tsp jeera (cumin) seeds
  • 1 tsp urad daal (skinned & split, not whole)
  • ¼ cup peanuts (skin removed, blanched)
  • 3 curry leaves
  • 2 green chillies sliced into thin circles
  • ¼ inch ginger root minced
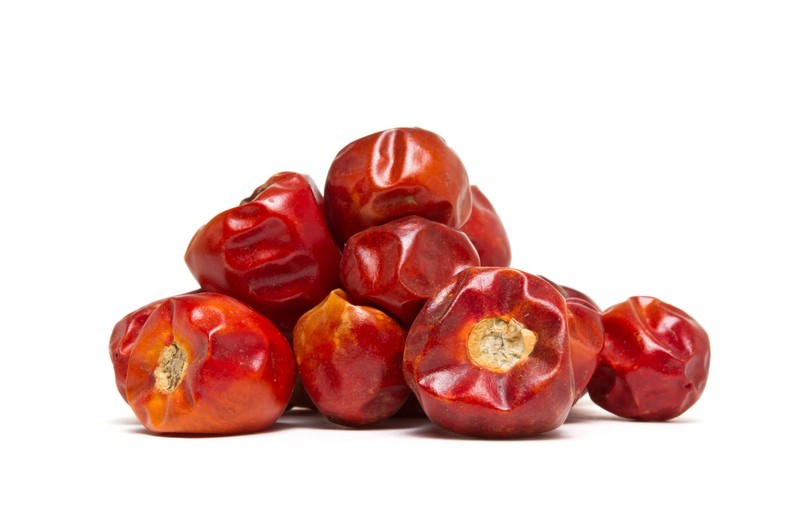
  • 2-3 dried red sambar chillies
  • ¼ cup lemon juice
  • Zest of ½ lemon

Procedure

  1. Heat the oil in a medium (3-4 quart/litre) saucepan
  2. Add peanuts and fry until golden brown
  3. While the peanuts are frying, wash rice, drain well and set aside
  4. Take peanuts out and set aside
  5. Add mustard seeds to oil and fry until they start sputtering
  6. Add jeera (cumin) seeds and fry for about 30 seconds
  7. At this point, heat up 1½ cups of water in the microwave for 1.5 minutes
  8. Add urad daal to the frying mixture and fry until it starts to turn brown
  9. Add green chillies, ginger, red chillies and curry leaves and fry for a minute
  10. Add turmeric powder and mix well, fry for 10 seconds
  11. Add the washed and drained rice and mix well with the spices and turmeric, fry for a minute
  12. Add the hot water to this rice, and let the whole mix come to a common temperature, then slowly add in the rest of the water
  13. Add the peanuts back in, the lemon zest and a third of the lemon juice
  14. Add salt and stir it up
  15. Cover the saucepan with a lid and cook on medium-low until almost all the water has drained (steam will reduce, but you'll still be able to tilt the pan and the rice will move slowly
  16. Turn off the heat and let the rice continue to cook in its steam for 2-3 minutes more
  17. Take off the lid and add in the rest of the lemon juice and mix gently taking care not to break the rice
The lemon rice is now ready to eat. Enjoy with daal, curd, pickle, papad or anything else.

Sunday, September 13, 2015

Upma

This morning S felt like Upma for breakfast, so I got into the kitchen, and quite accidentally made the best Upma we've tasted in a long while. I thought I'd write down the recipe before I forget.

Now I'm not someone who normally makes Upma. Growing up, the only use of rava/sooji/semolina was to make a porridge with milk, sugar, raisins and nuts. It was only when I got older and left home that I realised that the basic concepts were similar for Sheera Halwa and Upma. This recipe somewhat comes out of my experience making sooji porrige.

Ingredients

  • 1 cup rava (semolina)
  • 2½ cups water
  • 1-2 tsp salt (to taste)
  • 1 tsp sugar (to taste)
  • 1½ tbsp ghee (clarified butter)
  • ½ tsp mustard seeds
  • 1 tsp jeera (cumin) seeds
  • 1 tsp urad daal (skinned & split, not whole)
  • 5-6 cashews (unsalted)
  • 4 curry leaves
  • 2 green chillies sliced into thin circles
  • ¼ inch ginger root diced into small pieces
  • 2 tbsp lemon juice + some more to add while eating
  • 3-4 sprigs of fresh coriander coarsely chopped

Procedure

  1. Roast the rava in a non-stick saucepan/kadai until you smell the fragrance of the rava (3-4 minutes), stir frequently to prevent browning.
  2. At the same time, start boiling the water, along with 1 tsp of salt and sugar, once it starts boiling, reduce to low heat.
  3. Once roasted, move the rava into a bowl for later
  4. Now heat the ghee in the same saucepan on low heat
  5. Add in the mustard seeds
  6. Once the mustard begins to crackle, add the jeera and fry for about 10-20 seconds
  7. Now add the urad daal and fry until it just starts to turn brown
  8. Add cashews and stir often until brown. (At this point I actually turned off the heat as the ghee was quite hot)
  9. Add the chillies, ginger and curry leaves and fry for about a minute (I turned the heat back on about halfway through this)
  10. Now add the roasted rava into this mixture and let it fry for a bit. Stir it up so that everything is mixed and the remaining ghee is absorbed
  11. Now add the boiling water to the rava and stir until completely absorbed. You can turn off the heat halfway through this stirring
  12. Lastly, add 2 tbsp lemon juice and mix it up
  13. Taste and add more salt or sugar if required.
  14. Serve into bowls and garnish with chopped coriander leaves

Unfortunately we finished eating it before I could get any pictures, so I'll do that the next time, but if you try this, let me know how it works out.

Tuesday, February 18, 2014

Chicken Kori Rotti

Chicken Kori Rotti is a Mangalorean chicken curry dish where the curry is served over a thin, crisp rice rotti (not the regular soft rotis). It's really flavourful, and can be eaten with rice if you don't have the required rotti. I first tried it out at Mangalore Pearl when I lived in Bangalore. If you live in Bangalore and haven't been there, check out my review for Mangalore Pearl. Kori Rotti was my favourite dish there, and I was really excited when I found a packet of the specific rotti we need.
Rotti

Ingredients

First, the dry ingredients that have to be roasted:
  • 1.5 tsp Cumin seeds
  • 2.5 tsp Coriander seeds
  • 0.5 tsp Fennel seeds
  • 0.25 tsp Mustard seeds
  • 0.5 tsp Poppy seeds
  • 1 tsp black peppercorns
  • 15-25 red chillies (this depends on the spice level and the colour you like, use fewer chillies, and add kashmiri chilli powder if you want to reduce the spice level, but maintain the colour).
  • 1 cup shredded coconut (it's okay to use frozen shredded coconut, just make sure it has some moisture and fat).
  • A few curry leaves
  • 1 tsp crushed garlic
  • 0.5 medium onion thinly sliced (you'll use the other half below)
  • 1 tbsp vegetable oil (I use peanut oil)
Next, the ingredients for frying:
  • 0.25 tsp Mustard seeds
  • 0.5 medium onion thinly sliced
  • 2 cloves garlic sliced thin
  • A few curry leaves
  • 1 tsp turmeric powder
  • salt to taste
  • 2 tbsp vegetable oil
Last, the ingredients to cook the chicken:
  • 1-1.5 Kg (2-3lbs) Boneless Chicken Thighs (Skin is optional, but I used skinless chicken)
  • 2 tsp lemon juice (lime juice works as well)
  • 1 can (14oz == 1.75 cup) coconut milk

Procedure

First prepare the gravy (you can make this ahead of time as well). All of this is done in the same pot. Do not clean it out in between steps. We will use two holding bowls, one for the coconut, and one for everything else.
  1. Roast the cumin, coriander, fennel, mustard and poppy seeds from the first set of ingredients above over medium heat. Don't burn them, take them off the heat once you start to smell their oils come out.
  2. Transfer to a holding bowl.
  3. Roast the red chillies. This will take a couple of minutes. Transfer to the same holding bowl.
  4. Roast the black peppercorns. Transfer to the same holding bowl.
  5. Add a little vegetable oil to the pan and heat.
  6. Add in crushed garlic and fry for a few seconds.
  7. Add half onion and curry leaves and fry until onion is soft.
  8. Transfer this mixture to the same holding bowl as above.
  9. Roast the coconut until it just starts to turn brown. Transfer this into the second holding bowl.
  10. Everything except the coconut should be slightly cooled down by now, if not, wait a few more minutes before proceeding.
  11. Add all of the ingredients from the first holding bowl (everything except the coconut) into a blender with a little water, and blend it until it becomes a paste. You should end up with about 2.5 cups of paste.
  12. Pour half of this back into the holding bowl, and then add the coconut to the blender. Add a little more water and blend until it also turns into a paste. This will be lighter in colour than the first paste. Transfer back into the second holding bowl.
At this point you should have two gravy bowls. One with all the spices, which should be a dark orange to red coloured paste, and the second that includes the spices and the coconut. This should be a light orange paste. We now have the gravy ready, so we start with the chicken. Preparing the gravy
  1. Heat up 2 tbsp oil in the pot
  2. Add the mustard seeds and fry until they start sputtering
  3. Add in the sliced garlic and fry for a few seconds
  4. Add the curry leaves and fry for a few seconds
  5. Add the turmeric and some salt. Mix
  6. Add the half sliced onion, and fry until cooked.
  7. Add the chicken and fry for a few minutes tossing periodically to cook all sides. Add some salt to taste.
  8. Add the lemon juice and mix
  9. Cover the pot and cook on medium low for 3-4 minutes
  10. Add the first paste from above (the dark one), cover and cook for another 6-7 minutes
  11. Add the light paste and the coconut milk, cover and cook until chicken is tender and cooked through (another 5-7 minutes).
Serve over rotti or rice. It also tends to taste better the day after, so I generally eat this for 3 days at a stretch. Enjoy and let me know what you think. Also, if anyone knows where I can find rotti in Boston, please let me know. The one place I did find it in the past has stopped carrying it.
Finished Kori Rotti

Monday, April 18, 2011

Minestrone Soup

My mum would make minestrone soup for us when we were kids. This was back in India, so it was news to me when I found out that it's actually an Italian classic. It's traditionally a fall/winter soup, but with neither season showing up in India, it was more or less a year round evening soup. Searching online for recipes brought up many different ways of making it, with different ingredients. I got the gist of it, and decided to try my own. This is what I came up with:

Ingredients

  • 2 Tbsp olive oil
  • 1½-2 cloves of garlic, minced
  • 1 Tbsp mixed herbs (I used sage, thyme and marjoram)
  • 3 medium sized potatoes cut into cubes
  • 2 carrots, diced
  • 1.5-2 cups kidney beans (Rajma beans in India), pre-boiled (I used prepared canned beans). Drain them.
  • 2 cups diced tomatoes (along with the juice)
  • 4 cups vegetable stock
  • 1 cup button mushrooms, sliced
  • 1 cup shell pasta (uncooked)
  • 2 Tbsp baby spinach
  • Freshly ground pepper
  • Salt to taste

Method

  1. Heat the oil in a 3-4 quart (litre) pot
  2. Add the garlic and fry on medium-low for a minute
  3. Add the herbs and fry for about 20-30 seconds while stirring
  4. Add the carrots, potatoes and beans and fry for 1 minute
  5. Add the tomatoes and mix so that everything's coated with the liquid from the tomatoes
  6. Add the mushrooms and the vegetable stock and increase the heat to high until it just starts to boil
  7. Add salt and pepper (I grind the pepper directly into the mixture), and mix
  8. Add in the pasta and spinach, and reduce heat to medium. Cook uncovered until pasta is ready.
  9. Turn off the heat and serve sprinkled with parmesan cheese
We also got a large loaf of sunflower-honey bread which we lightly crisped in the oven at 300℉ for 3 minutes.

The soup came out well and serves 7-8 people as a meal in itself.

Wednesday, February 09, 2011

The Waffle Special

At King's Circle/Maheshwari Udyan in Mumbai, is a little Softy shop known as Just Chill. Originally called 7-11, it was renamed after the Mumbai train bombings on July 11, 2006. This family run softy shop has been popular among local college students for decades, and the prices haven't changed much since I first visited about 14 years ago. They have a variety of special softies (see photo of menu), but the one that I always go back for is the Waffle Special.

Making the waffle specialThe Waffle Special is their largest speciality softy, and to make it requires a pilgrimage around the store. It requires ingredients from every corner, and a specific order to adding them. It's also the most expensive item on the menu, and at twice the price of their other specialty items it's a rare treat for a college student. The first time I tried it, I was hooked. Back in college a few of us would pool in cash to get one, and while it's easily affordable today, it still tastes much better when split with a friend.

Three flavours of softy, nuts, caramel, waffle chips, chocolate sprinkles and two types of chocolate sauce all filled into a huge waffle cone that's been sealed on the inside with chocolate sauce so it doesn't leak. It takes a while to get through, and it's very hard to eat without a spoon. Definitely on my must visit list when I'm in Mumbai. This is what it looks like when done:
Finished product
Just Chill is to the right of Café Mysore and on the Eastern Express highway.

Monday, January 03, 2011

Wheat Berry Salad

I've made this a few times using different styles and it's come out well on all occasions. The main ingredient of this salad is whole wheat grains and it's really healthy and tasty.

Ingredients

  • 2 cups wheat berries (also known as whole wheat grains)
  • 3 Tbsp sesame oil
  • 1/4 cup rice wine vinegar
  • Salt & Pepper to taste
  • Lemon juice to taste
  • 1/4 cup dried + sweetened cranberries
  • 1/4 cup dried apricots, chopped
  • 1/4 cup mixed raisins
  • 1/4 cup toasted and sliced almonds
  • 1/4 cup sliced green onions

Preparation

  1. Place wheat in water such that the water level is approximately 2 inches above the wheat. Soak for 8 hours. (You probably want to do this overnight)
  2. Drain completely and then cover with water again to approximately 2 inches over the wheat. Bring to a boil and then reduce heat to low.
  3. Allow to simmer for 1 hour.
  4. Drain completely.
  5. Toss in oil
  6. Add in vinegar
  7. Add in cranberries, apricots, raisins and almonds and toss
  8. Add salt, pepper and lemon juice to taste
  9. Just before serving add in green onions.
  10. Serve warm or at room temperature

Variations

We tried a few variations that came out nicely. First, you could use olive oil instead of sesame oil, but you might need more than 3 tablespoons. If using Olive Oil, Balsamic Vinegar tends to go better than Rice Wine Vinegar. You could use other kinds of nuts as well. We tried Pecans and Pine Nuts.

Once the wheat is cooked, preparation is quick. You can cook the wheat a day in advance and refrigerate, then heat it in the microwave or on the stove just before adding other ingredients.

Thursday, July 01, 2010

Minty scrambled eggs

As a child, I always loved eggs. My parents would make them in almost every style possible. I had a few of my own though (Pizza Eggs and Golfer's Eggs). However, my favourite has always been scrambled eggs — just the way my dad, mum and grandma used to make them. I've added a little of my own style to it, and this is what I have:

Ingredients

  • 2 Eggs
  • ½ Cup Milk
  • Salt & Pepper to taste
  • 1 tsp chopped up mint leaves (I used dried mint)
  • 1 Tbsp butter

Method

  1. Break 2 eggs into a mixing dish
  2. Add milk, salt, pepper and mint, and ½ Tbsp butter
  3. Mix with an egg whisk until bubbles start to form (or until you're tired)
  4. Meanwhile, heat the rest of the butter in a pan on medium
  5. Add mixture to pan
  6. Let it cook for a few minutes until the base starts to bind
  7. Now stir frequently with a wooden spoon until most of the liquid (from the milk) has evaporated
  8. Serve and eat with toast
Simple, good for any meal.

Tuesday, May 18, 2010

Pea soup with mint and goat cheese

Ok, Pea soup isn't necessarily the most exotic dish around, but I really like it on a cold day, and I think I've found a combination of ingredients that go well together, so here goes.

Note that my recipe isn't vegetarian, but it's easy to modify for a vegetarian version. The following makes two cups.

Ingredients

  • ½ Tbsp butter
  • 1 tsp ginger & garlic paste
  • 1½ cup chicken stock (use vegetable stock for a veggie option)
  • ½ cup water
  • 1 Tbsp goat cheese
  • 1 Tbsp mint leaves chopped up
  • 1½ cup peas (I used frozen peas)
  • ¼ tsp salt
  • Freshly ground pepper to taste

Preparation

  1. Heat the butter in a saucepan
  2. Lower the heat and add the ginger & garlic paste and fry for 10-20 seconds
  3. Add in the stock, water and salt and turn up the heat
  4. Before it comes to a boil, add in the goat cheese and stir till it dissolves
  5. Once the mixture starts to boil, add in the peas. If frozen, add a few at a time to avoid a sudden change in temperature
  6. Bring to a boil again and lower heat to medium
  7. Stir in mint leaves
  8. Turn heat to low and simmer for 5 minutes
  9. Serve with croutons
Some people don't like their peas whole. If you don't, then put the mixture into the blender after step 7.

It came out better than I'd expected. The goat cheese and mint flavours worked well together.

Wednesday, April 07, 2010

Floyd's India

Floyd's India is a somewhat entertaining TV show and book about Keith Floyd's food adventures in India. Unable to pronounce the names of the ingredients or follow a recipe, his preparations often look nothing like what we'd make at home. He's fairly amusing to watch, while at the same time clarifying why you wouldn't normally eat British food.

Sunday, January 10, 2010

Spicy shrimp salad

Made this yesterday, and I do have pictures, but currently no way to get them off my camera, so that will have to wait for later.

Ingredients:

  • 250gm (8oz) shrimp. shelled, deveined and cooked (steam or boil it)
  • 1/4 cup coriander/cilantro leaves chopped up (note the difference)
  • 1/2 cup chopped romaine lettuce leaves (use the hearts for a different variation)
  • Juice of 1/2 lime
  • 3 Tbsp Maggi hot and sweet tomato chilli sauce (or equivalent - you need something sweet and spicy, so try mixing tabasco + tomato, or use thai sweet chilli sauce)
  • 2-3 tsp honey (this is only if your sauce is too spicy for your liking)
  • One navel orange (we use this for garnish and for its juice)
  • A few mint leaves for garnish (optional)

Method:

  1. Combine sauce, honey, shrimp, lime juice and coriander in a bowl and mix until shrimp and coriander are well coated. You should be able to smell the lime.
  2. Add chopped lettuce on a large plate.
  3. Add shrimp mix over lettuce.
  4. Sprinkle a few drops of orange juice over the salad.
  5. Garnish with orange rings and mint leaves.
  6. Serve chilled.
It came out really well.

Monday, September 28, 2009

Couscous salad

I tried out something new today. It's couscous based, but stir-fried in preparation. It came out fairly well, so I'm posting here.

Ingredients:

  • 1/3 cup couscous
  • 1/2 cup chicken or vegetable stock
  • 1/4 cup peas
  • 1/4 cup sweet corn
  • 1/4 cup assorted raisins
  • 1/4 cup pine nuts
  • 1 Tbsp basil leaves, chopped
  • 2 Tbsp mint leaves, chopped
  • 1 tsp cumin seeds
  • 1 tsp Chinese 5 spice
  • 2 Tbsp extra virgin olive oil
  • Salt & Pepper to taste

Method:

  1. Heat the stock + 1Tbsp oil in a saucepan until it comes to a boil
  2. Stir in the couscous, remove from heat, cover and keep aside
  3. Heat a large skillet
  4. Add 1 Tbsp oil
  5. Add Chinese 5 spice and cumin seeds and fry for half a minute
  6. Add in raisins, nuts, peas and corn and stir fry for 2 minutes
  7. Mix in Couscous, mint and basil leaves
  8. Stir fry until Couscous no longer sticks to your ladel (I use a wooden ladel)
  9. Turn off the heat and continue to mix it for another 30 seconds
That's it. You can eat it on its own or with yogurt or as a side dish for a larger meal. For a spicier version, use Indian garam masala instead of Chinese 5 spice. It should serve 3 people as a side dish.

I haven't yet thought of a good name for this dish, so if you have any ideas, leave a comment.

Saturday, June 27, 2009

Sweet and Sour vegetables with pears

Last night a bunch of my old classmates dropped in for the evening. To mark the occasion, I decided to try something new. This recipe was the outcome. It's based on the sweet & sour recipe that my parents used to make while we were young, but I've used different spices.

Ingredients:

  • 2 tbsp vegetable oil
  • 4 tsp chinese 5 spice
  • sweet red chilli sauce to taste (I used thai)
  • hot chilli sauce to taste (I used maggi hot & sweet tomato chilli sauce)
  • 2 tsp white vinegar
  • 1 tsp lemon juice
  • 1/2 tsp salt
  • 1/4 cup Straw mushrooms
  • 1/4 cup baby corn
  • 1/4 cup bamboo shoots
  • 1/4 cup baby carrots
  • 1/4 cup brocolli florets
  • 1/4 cup cauliflower florets
  • 1/4 cup tofu cubes
  • 1/4 cup sliced pears (either canned or fresh but stewed to soften them)

Method:

  1. Preheat a large skillet on high
  2. Add the 2 tbsp oil and heat for 1 minute
  3. Reduce heat to medium
  4. Add the chinese five spice and fry it for 1 minute
  5. Increase heat to high, add the tofu and stir fry until well coated with the oil and spice
  6. Add in carrots, brocolli and cauliflower and stir fry until tender but not soft
  7. Add in the mushrooms, baby corn and bamboo shoots and stir fry until all vegetables are coated
  8. Add in the pears and mix well
  9. Sprinkle vinegar and lemon juice into the skillet and mix it up
  10. Add sweet red chilli sauce - 3tbsp is the base line, increase or decrease depending on desired sweetness level
  11. Add hot chilli sauce - 3tbsp is the base line, increase or decrease depending on desired heat level
  12. Stir fry for an additional one or two minutes
  13. Reduce heat to medium for 1 minute, then cover skillet and reduce heat to low for another two minutes
Serve with of rice noodles or steamed rice.

Variations:

For a non-vegetarian option, add in shrimp, thinly sliced chicken or cubes of pork. If using shrimp, add it in after the pears, if using chicken or pork, either pre-cook the meat and add it in after the pears, or add it in before the tofu and fry thoroughly for about 5 minutes.

Alternately, coat the shrimp, chicken or pork in a corn flour based batter and deep fry it before adding to the mix.

Sunday, June 15, 2008

Chicken Marsala with Prunes

I've tried this recipe a few times now, and I think I'm getting better at it. I've also made some of my own tweaks to suit my taste. It's probably not Chicken Marsala any more, so purists might not like me using the name, but hey, they don't have to eat it if they don't like.

Here's what I did:

Ingredients (serves 1):

  • 1 tbsp extra virgin olive oil
  • 1 chicken breast - skinless and boneless
  • 1 cup of sliced mushrooms
  • 1 clove of garlic finely chopped
  • ¼ cup sweet Marsala wine
  • ½ tsp salt
  • ¼ cup chicken stock
  • 1 tbsp all purpose flour
  • ¼ cup pitted prunes (just for effect)
  • 1 sprig of parseley
You can also add one small onion chopped up, which can be mixed with the garlic and mushrooms. Depends on your taste. I didn't use one because my onion sprouted.

I also made some couscous to have the chicken with, but you can use rice or mashed potatoes as well. Follow the instructions on the packet to make enough for one person.

Method:

  1. Start by heating the oil in a slightly deep non-stick pan on medium high.
  2. Fry the chicken breast for about 2 minutes on each side until it's lightly brown on both sides. While this is happening, heat up the chicken stock and wine to slightly above room temperature. 20 seconds in the microwave is generally enough.
  3. Move the chicken to one side of the pan, and add the mushrooms and garlic (and onion if you have one) to the other side.
  4. Fry the mushrooms until tender, but not too long that it turns brown. Stir often.
  5. Add the wine, and bring to a boil. While this is happening, mix the salt and all purpose flour into the chicken stock. Mix it well into a paste.
  6. Add the chicken stock mixture and bring to a boil again.
  7. Add prunes, and reduce heat to low.
  8. Cover and cook for 12-15 minutes until chicken is fully cooked (see that there are no pink portions inside)
Also cook your rice or couscous alongside the chicken so that it's ready at around the same time.

Serve chicken on top of couscous, add sauce, mushrooms and prunes over it allowing it to drip off to the side. Garnish with parsley.

Enjoy.

Let me know how it works out for you.

Sunday, May 06, 2007

Pizza Eggs

This was probably my first attempt at cooking. As a child, I loved eating fried eggs for breakfast, and sometimes for dinner too. I also loved pizza, and wondered if I could make a pizza on a fried egg rather than a bread base. Thus was born, the Pizza Egg.

Ingredients:

  • 1 or 2 eggs
  • 1 or 2 tomatoes diced
  • Cocktail sausages, chopped into thin slices
  • Salami, cut into strips
  • Sliced cheese, cut into strips
  • Salt
  • Tomato Ketchup
  • 1 tbsp cooking oil (your choice of oil)
Some people may want to skip the oil and use a non-stick pan, but I don't really reccommend that. It just doesn't taste the same, and you won't get an egg spitting without oil.

Keep all your ingredients ready before you start cooking. Things move really fast once you start. You may want to pre-fry the salami and sausages if you prefer.

Method:

  1. Heat the oil in a frying pan, then turn the flame to low
  2. Break the eggs and slide them onto the pan in quick succession
  3. Add the diced tomatoes, sliced salami and sausages onto the surface of the eggs while they're still liquid.
  4. Allow to fry for a till the egg sets and holds onto the meat and tomatoes.
  5. Add ketchup.
  6. Add cheese strips over the top, and allow to melt.
  7. Turn off the flame, add salt to taste and serve.

Variations:

If you'd rather not have the yolk in a liquid state, you can do one of two things. Either flip the egg for a bit after everything has set. This can be tough since the tomatoes will start to leak. Alternately, break the yolk while adding ingredients.

If you have kids at home, try this variation on eggs. They might just love it.

Saturday, April 29, 2006

Junglee Pulao

One of my favourite dishes as a child was Junglee Pulao. My uncle used to make it for us every now and then. The way he made it, the rice would be slightly overcooked and soggy, and I liked it that way. I wouldn't tolerate soggy rice in any other dish, but for junglee pulao, it couldn't have been any other way.

Today, waking up all groggy and hungry at lunch time, I started thinking about what to make. First thought about biryani. Then realised that I was way too hungry to wait till it was done. Decided to go the shortcut and try the famous junglee pulao. I used mushrooms and potatoes, but you can also use mutton and other vegetables. Stay away from sweet vegetables though, because they add weirdness to the taste.

Ingredients (serves one):

  • 2 tsp jeera powder
  • 1 tsp coriander powder
  • 1/2 tsp haldi powder
  • 1 tsp chilli powder
  • 1/2 tsp garam masala
  • 2 tsp salt
  • pepper optional, to taste (I didn't include any)
  • 250gm curd
  • 1 cup rice, washed
  • 2 cups water
  • 2 cloves
  • 2 cardamoms
  • 1 packet button mushrooms chopped up
  • 2 large potatoes cut into 6 pieces each
  • 1.5 tbsp sunflower oil

Method:

  1. Heat the oil in a pressure cooker
  2. Add the chilli powder, jeera powder, haldi powder and coriander powder
  3. At the same time, boil the water in a saucepan and add the salt to it
  4. Once the masalas have fried and you can really smell it, add the mushrooms and potatoes
  5. Mix it around a bit until the water from the mushrooms comes out and they start cooking in it
  6. Add the rice
  7. Add boiling water
  8. Mix and allow to boil for a bit
  9. Add curd and garam masala
  10. Close the pressure cooker and leave it on high flame for one whistle and then 2-3 minutes on medium flame.
Once all steam has escaped (you may need to let some of it out if you're ready to eat), open the cooker and serve.

Other variations include using mutton instead of mushrooms. In that case, you need to fry the mutton for a little longer before you add the potatoes, and leave the pressure on for 2 whistles, You may also want to fry onions and tomatoes and ginger-garlic paste with the meat/mushrooms. Experiment with different combinations for different flavours.

You can get interesting flavours by adding various kinds of nuts. My favourite would be pine seed, slightly roasted.

If you want it more spicy, add pepper.

Try it and let me know how you like it.

Thursday, December 29, 2005

Rich fruit Christmas Cake

Today's recipe is by my guest blogger Sneha, aka bluesmuse.

Hello everyone! Seasons Greetings to all.

Making Christmas sweets is a family tradition and Christmas Cake is a big part of it. Earlier in the week, Phil's dad, the very talented Chef Eric had prepared most of the goodies. Christmas cakeHe was helped at a few stages by his niece Sabrina and by me. This year Phil and I decided to make the Christmas Cake. You should know now that I've never made a fruit cake before, yea I've baked lots of cakes but, they were relatively simple chocolate or pineapple or brownies. Nevertheless, I was extremely excited to make the cake. Mainly because the fruits would be soaked in rum or sherry and after baking the various juices of the fruits and of the spices added, along with the alcohol feels like heaven in your mouth!

Ok before this gets too long, I'll start with the recipe.

This is the recipe for the Rich Fruit Christmas Cake. There is also an option for making the Economical Fruit Cake. The recipe for both remains the same, the only difference being, that the quantities of the fruits added in the Economical is roughly half of the one in the Rich Fruit cake.

Christmas Cake.

Ingredients:

  • 225g/8oz seedless raisins
  • 225g/8oz currants
  • 225g/8oz sultanas
  • 100g/4oz chopped mixed peel (this is the tutty-fruity that is available in the market)
  • 50g/2oz almonds/ cashew nuts, ground or finely chopped
  • 50g/2oz glacĂ© cherries, quartered, washed and dried
  • grated rind of 1 lemon
  • 225g/8oz butter
  • 175g/6oz light or dark soft brown sugar
  • 4 eggs
  • 225g/8oz plain flour
  • pinch of salt
  • 1 teaspoon mixed spice
  • 1/2 teaspoon ground cinnamon
  • good pinch of ground nutmeg
  • 2 tablespoons brandy, sherry or lemon juice. We used lemon juice.
  • 3-4 tablespoon brandy (optional)

Method

Mixed fruits
  1. Mix together the dried fruits, peel, almonds or cashew nuts, cherries and lemon rind.
  2. Cream the butter and sugar together until light and creamy.
  3. Beat in the eggs one at a time following each with a tablespoon of flour.
  4. Sift the remaining flour with salt and spices and fold into the creamed mixture followed by brandy, sherry or lemon juice. Add the fruit mixture and combine well.
  5. Turn into a greased and lined 20 cm/8 inch round or 18 cm/7 inch square cake tin, level the top, then make a slight hollow in the centre. Careful not to make it too deep as this doesn't rise much and you might end up with a deflated cake
  6. Wrap several thicknesses of brown paper or newspaper round the outside of the tin and bake in a pre-heated oven for 3 1/2 - 3 3/4 hours or until skewer inserted into the centre of the cake comes out clean. If the cake mixture does not fit into one container and you have to use two, do not keep in the oven for the specified time. Instead check after 2 1/2 hours and keep back only if required.
    Another way of knowing that your cake is done when, you can smell it.
  7. Cool in the tin, then turn out on to a wire rack. Store in a airtight container or wrapped in foil until required.
  8. If using extra brandy, pierce the cake all over with a fine skewer and drizzle 3-4 tablespoons brandy over it before storing. Instead of brandy, you can also use orange juice with rum. I suggest that you do this when the cake is considerably warm. If you wait till later then the cake might get too dry and crumbly.
Beat with flourIn fact, this is what happened with us. We thought that the cake mixture would not fit into one container. So, we put it in two different ones. But, we still kept it in the oven for the specified time. As a result it got overcooked. Next we decided to let it cool and then add the additional fruit juice and rum. This was another mistake because, first of all, our cake was overcooked and dry and, by cooling further we lost all chance of making it moist and juicy. By this time I was really upset, thinking that I had made a complete disaster of the Christmas cake.

Just then Chef Eric came to the rescue. He took the smaller cake which hadn't been cut and brushed on the juice and rum mixture. He then let it soak in and then put it in the microwave for 15 seconds with a break of 3-4 mins between each cycle. This heated up the cake and allowed the juices to soak in. After repeating this cycle 15-20 times, we had a perfect juicy yummy Christmas Cake!!!

The entire procedure was documented with pictures, so go see them.

Thursday, October 13, 2005

Mushroom stew

A couple of nights ago, I reached home after midnight, really hungry. Had a packet of mushrooms in the fridge - I keep them frozen to retain the moisture, and some kotmir (coriander) and pudina (mint) leaves. Decided to try some experimentation.

Now, the thing about mushrooms (button mushrooms), is that they have a lot of water in them, and they almost never require any additional liquid to cook in... well, it depends. If you use whole mushrooms, then it takes a while for the liquid to come out, if you use chopped mushrooms, the liquid comes out pretty quickly.

So, let's get started.

Ingredients:

  • 1 cup button mushrooms cut into quarters
  • 1/2 bunch each of coriander and mint leaves, chopped up
  • Parmesan cheese or 1 slice of fat-free/low-fat cheese
  • 1/2 tsp Salt
  • 1 tsp freshly ground pepper powder

Method:

  1. Put the mushrooms into a saucepan/wok on low flame, and stir for a bit till a little liquid comes out of them. You may want to add a little (very little) water just to keep the vessel from overheating.
  2. Add salt to the water, stir, and cover the dish once enough liquid is out.
  3. Leave covered for about a minute, then add pepper, and the coriander and mint leaves, and stir a bit till it's well mixed.
  4. Add the cheese and stir till completely melted.
  5. Cover the pan and leave to simmer for a minute or two, and then turn off the flame with the pan still covered (this is to stop the steam from escaping).
Uncover the dish when you're ready to eat. Serve in a bowl, and eat with fresh appams.

Tuesday, September 27, 2005

Indian Coffee House

The India Coffee House is a chain of coffee houses across India. I believe they started in Calcutta over a century ago and spread out from there.

This is a place that one can go to to get cheap coffee and snacks. As interns in Mumbai we used to frequent the place for lunch. In bangalore it's a good place for a bunch of friends to just hang out and chat. You get the bill even before your order arrives, but that's part of the charm of the place.

The uniform worn by the waiters hasn't changed ever, and the walls are sprinkled with old posters.